Copyright 2024-2026, MASSACHUSETTS INSTITUTE OF TECHNOLOGY
Subject to FAR 52.227-11 – Patent Rights – Ownership by the Contractor (May 2014).
SPDX-License-Identifier: MIT
Hugging Face Image Classification Example#
The MAITE library provides interfaces for AI components such as datasets, models, metrics, and augmentations to make their use more consistent across test and evaluation (T&E) tools and workflows.
In this tutorial you will use MAITE, in conjunction with a set of common libraries, to:
Wrap an image classification dataset from Hugging Face (CIFAR-10),
Wrap an image classification model from Hugging Face (Vision Transformer),
Wrap a metric from TorchMetrics (multiclass accuracy), and
Compute performance on the clean dataset using MAITE’s evaluate utility.
Once complete, you will have a basic understanding of MAITE’s interfaces for datasets, models, and metrics, as well as how to use MAITE’s native API for running evaluations.
This tutorial does not assume any prior knowledge, but some experience with Python, machine learning, and the PyTorch framework may be helpful.
Getting Started#
This tutorial uses MAITE, PyTorch, Torchvision, TorchMetrics, Hugging Face datasets and transformers, and Matplotlib.
For running this notebook on your local machine, you can use the following commands to create a conda environment with the required dependencies:
conda create --name hf_image_classification python=3.10 pip
conda activate hf_image_classification
pip install maite datasets jupyter matplotlib torch torchmetrics torchvision transformers watermark
Now that you have an environment, we import the necessary libraries:
from typing import Any, Optional, Sequence

import datasets
import matplotlib.pyplot as plt
import numpy as np
import torch
from torchmetrics import Accuracy, Metric
from torchvision.transforms.functional import resize, to_tensor
from transformers import AutoModelForImageClassification, ViTForImageClassification

import maite.protocols.image_classification as ic
from maite.interop.metrics.torchmetrics import TMClassificationMetric
from maite.protocols import ArrayLike, DatasetMetadata, MetricMetadata, ModelMetadata
from maite.tasks import evaluate

%load_ext watermark
%watermark -iv -v
Python implementation: CPython
Python version       : 3.12.13
IPython version      : 9.12.0

datasets    : 4.8.4
maite       : 0.9.5
matplotlib  : 3.10.8
numpy       : 2.4.4
torch       : 2.11.0
torchmetrics: 1.9.0
torchvision : 0.26.0
transformers: 5.4.0
Wrapping a Hugging Face Dataset#
We’ll be working with a common computer vision benchmark dataset called
CIFAR-10, which
consists of color images (size 32 x 32 pixels) covering 10 classes
(airplane, automobile, bird, cat, deer, dog, frog, horse, ship, and
truck). The dataset is available through the Hugging Face datasets
library, which provides access to officially curated datasets as well as
datasets contributed to Hugging Face
Hub from the machine learning
community.
First we load a subset of the “native” Hugging Face dataset:
subset_size = 256
hf_dataset: datasets.Dataset = datasets.load_dataset(
    "cifar10", split=f"test[:{subset_size}]"
)  # type: ignore
README.md: 0.00B [00:00, ?B/s]
Warning: You are sending unauthenticated requests to the HF Hub. Please set a HF_TOKEN to enable higher rate limits and faster downloads.
plain_text/train-00000-of-00001.parquet: 0%| | 0.00/120M [00:00<?, ?B/s]
plain_text/test-00000-of-00001.parquet: 0%| | 0.00/23.9M [00:00<?, ?B/s]
Generating train split: 0%| | 0/50000 [00:00<?, ? examples/s]
Generating test split: 0%| | 0/10000 [00:00<?, ? examples/s]
Next, we wrap the dataset so it can be used with MAITE.
In order to facilitate executing T&E workflows with datasets from
difference sources (e.g., existing libraries like Torchvision or Hugging
Face or custom datasets), MAITE provides a Dataset protocol that
specifies the expected interface (i.e, a minimal set of required
attributes, methods, and method type signatures).
At a high level, a MAITE image classification dataset needs to have two
methods (__len__ and __getitem__) and return the image, target
(label/class), and metadata associated with a requested dataset index.
The dataset also needs to have a metadata attribute containing some
basic metadata (at least an id field).
The following wrapper internally converts from the “native” format of the dataset to types compatible with MAITE:
class HuggingFaceDataset:
    def __init__(
        self,
        hf_dataset: datasets.Dataset,
        id: str,
        index2label: dict[int, str],
        resize_shape: Optional[list[int]] = None,
    ):
        self.hf_dataset = hf_dataset
        self.num_classes = hf_dataset.features["label"].num_classes
        self.resize_shape = resize_shape

        # Create required dataset metadata attribute
        self.metadata: DatasetMetadata = DatasetMetadata(id=id, index2label=index2label)

    def __len__(self) -> int:
        return len(self.hf_dataset)

    def __getitem__(
        self, index: int
    ) -> tuple[torch.Tensor, torch.Tensor, ic.DatumMetadataType]:
        if index < 0 or index >= len(self):
            raise IndexError(
                f"Index {index} is out of range for the dataset, which has length {len(self)}."
            )

        # Get the PIL image and integer label from the base HF dataset element (which is a dictionary)
        item = self.hf_dataset[index]
        img_pil = item["img"]
        label = item["label"]

        # Convert the PIL image to a PyTorch tensor for compatibility with PyTorch libraries
        img_pt = to_tensor(img_pil)

        # Apply resizing if requested
        if self.resize_shape is not None:
            img_pt = resize(img_pt, self.resize_shape)

        # Create one-hot encoded tensor with true class label for this image
        target = torch.zeros(self.num_classes)
        target[label] = 1

        return img_pt, target, ic.DatumMetadataType(id=index)
We now create an instance of the MAITE complient version of the Hugging Face dataset.
Note that the dataset variable has ic.Dataset as the type hint. If
your environment has a static type checker enabled (e.g., the Pyright
type checker via the Pylance language server in VS Code), then the type
checker will verify that our wrapped dataset conforms to the protocol
and indicate a problem if not (e.g., by underlining with a red
squiggle).
# Create map from integer class index to string label
num_classes = hf_dataset.features["label"].num_classes
index2label = {i: hf_dataset.features["label"].int2str(i) for i in range(num_classes)}

# Wrap dataset
wrapped_hf_dataset: ic.Dataset = HuggingFaceDataset(
    hf_dataset, id="CIFAR-10", index2label=index2label, resize_shape=[224, 224]
)

print(f"{len(wrapped_hf_dataset) = }")
len(wrapped_hf_dataset) = 256
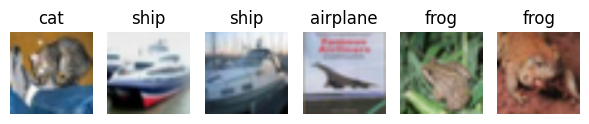
Here are some sample CIFAR-10 images along with their ground truth labels:
ncols = 6
fig, ax = plt.subplots(1, ncols, figsize=(6, 2))
for i in range(ncols):
    # Get datum i
    img, label_onehot, md = wrapped_hf_dataset[i]

    # Convert to NumPy array in height, width, color channel (HWC) order (for display with matplotlib)
    img_np = np.asarray(img).transpose(1, 2, 0)

    # Get ground truth class index and label
    index = torch.as_tensor(label_onehot).argmax().item()
    label = index2label[int(index)]

    # Plot image with label
    ax[i].axis("off")
    ax[i].imshow(img_np)
    ax[i].set_title(label)

fig.tight_layout()
Wrapping a Hugging Face Model#
In this section, we’ll wrap a Hugging Face Vision Transformer (ViT) classification model that is available through Hugging Face Hub. The model has been trained on ImageNet-21k and fine-tuned on the CIFAR-10 dataset.
First we load the “native” Hugging Face model:
hf_model: ViTForImageClassification = AutoModelForImageClassification.from_pretrained(
    "aaraki/vit-base-patch16-224-in21k-finetuned-cifar10"
)
config.json: 0.00B [00:00, ?B/s]
pytorch_model.bin: 0%| | 0.00/343M [00:00<?, ?B/s]
Loading weights: 0%| | 0/200 [00:00<?, ?it/s]
Next we wrap the model to conform to the MAITE ic.Model protocol,
which requires a __call__ method that takes a batch of inputs and
returns a batch of predictions. The model also needs to have a
metadata attribute containing some basic metadata (at least an
id field).
class HuggingFaceModel:
    def __init__(
        self,
        hf_model: ViTForImageClassification,
        id: str,
        index2label: dict[int, str],
        device: str = "cpu",
    ):
        self.hf_model = hf_model
        self.device = device

        # Create required model metadata attribute
        self.metadata: ModelMetadata = ModelMetadata(id=id, index2label=index2label)

        # Move the model to requested device and set to eval mode
        self.hf_model.to(device)  # type: ignore
        self.hf_model.eval()

    def __call__(self, batch: Sequence[ArrayLike]) -> Sequence[torch.Tensor]:
        # Combine inputs into PyTorch tensor of shape-(N,C,H,W) (batch size, color channels, height, width)
        batch_pt = torch.stack([torch.as_tensor(x) for x in batch])

        # Move tensor to the desired device
        batch_pt = batch_pt.to(self.device)

        # Apply model to batch (NOTE: preprocessing not needed for this particular HF model)
        output = self.hf_model(batch_pt)

        # Restructure to expected output format (sequence of probability/logit vectors)
        result = [x for x in output.logits.detach().cpu()]
        return result
wrapped_hf_model: ic.Model = HuggingFaceModel(
    hf_model, id="vit-base-patch16-224-in21k-finetuned-cifar10", index2label=index2label
)
For an initial test, we’ll manually create an input batch and perform inference on it with the wrapped model:
# Create batch with single image
i = 0
x, y, md = wrapped_hf_dataset[i]
xb, yb, mdb = [x], [y], [md]

# Apply model and get first (only) prediction of size-1 batch of results
preds = wrapped_hf_model(xb)[0]
y_hat = torch.as_tensor(preds).argmax().item()

# Plot image with model prediction
fig, ax = plt.subplots(figsize=(1.5, 1.5))
img_np = np.asarray(x).transpose(1, 2, 0)
ax.axis("off")
ax.imshow(img_np)
ax.set_title(f"pred: {index2label[int(y_hat)]}")
fig.tight_layout()

We see that the model predicts the correct class for the first example. But we’d like to perform a more quantitative evaluation across a larger set of images.
Metrics#
In this section we wrap a TorchMetrics metric to conform to the MAITE
ic.Metric protocol.
First we create a “native” TorchMetrics accuracy metric:
tm_acc: Metric = Accuracy(task="multiclass", num_classes=10)
Next we wrap the metric as a MAITE ic.Metric that has the required
update, compute, and reset methods, as well as the required metadata
attribute:
class TorchMetricsClassificationMetric:
    def __init__(self, tm_metric: Metric, name: str, device: str = "cpu"):
        self.tm_metric = tm_metric
        self.name = name
        self.device = device

        # Create required metric metadata attribute
        self.metadata: MetricMetadata = MetricMetadata(id=name)

    def reset(self):
        self.tm_metric.reset()

    def update(
        self,
        pred_batch: Sequence[ArrayLike],
        target_batch: Sequence[ArrayLike],
        metadata_batch: Sequence[ic.DatumMetadataType],
    ) -> None:
        # Convert inputs to PyTorch tensors of shape-(N, num_classes)
        preds_pt: torch.Tensor = torch.stack(
            [torch.as_tensor(x) for x in pred_batch]
        ).to(self.device)
        assert preds_pt.ndim == 2

        targets_pt: torch.Tensor = torch.stack(
            [torch.as_tensor(x) for x in target_batch]
        ).to(self.device)
        assert targets_pt.ndim == 2

        # Convert probabilities/logits to predicted class indices and update native TorchMetrics metric
        self.tm_metric.update(preds_pt.argmax(dim=1), targets_pt.argmax(dim=1))

    def compute(self) -> dict[str, Any]:
        result = {}
        result[self.name] = self.tm_metric.compute()
        return result
wrapped_tm_acc: ic.Metric = TorchMetricsClassificationMetric(tm_acc, "accuracy")
Procedures#
Now we’ll run MAITE’s evaluate procedure, which manages the process
of performing model inference on the dataset and computing the desired
metric.
results, _, _ = evaluate(
    dataset=wrapped_hf_dataset, model=wrapped_hf_model, metric=wrapped_tm_acc
)

results
0%| | 0/256 [00:00<?, ?it/s]
model.safetensors: 0%| | 0.00/343M [00:00<?, ?B/s]
{'accuracy': tensor(0.9531)}
We see that the model performs very well on this dataset, achieving an accuracy of over 95%.
Interop#
MAITE contains wrappers for common third-party libraries such as TorchMetrics in its interop package, e.g,
maite.interop.metrics.torchmetrics.TMClassificationMetric
When a wrapper is available in MAITE (or another source, e.g., the NRTK library for natural perturbations), we recommend using it for both convenience and reliability instead of “manually” writing a wrapper from scratch.
Here we run evaluate again using the TorchMetrics wrapper from MAITE
interop and get the same result as above:
# Wrap native metric using wrapper from MAITE interop
metadata: MetricMetadata = {"id": "torchmetrics_multiclass_accuracy"}
interop_wrapped_tm_acc: ic.Metric = TMClassificationMetric(
    tm_acc, metadata=metadata, output_key="accuracy"
)

# Re-run evaluate
results, _, _ = evaluate(
    dataset=wrapped_hf_dataset, model=wrapped_hf_model, metric=interop_wrapped_tm_acc
)

results
0%| | 0/256 [00:00<?, ?it/s]
{'accuracy': tensor(0.9531)}
Congratulations! You have now successfully used MAITE to wrap a dataset, model, and metric from various libraries, and run an evaluation to compute the performance of the pretrained model on a subset of the CIFAR-10 test split.